After you have created your Widget and you are happy with how it looks and functions, the next step is to embed it on your website.
The process is the same for a Chart, Table and HTML.
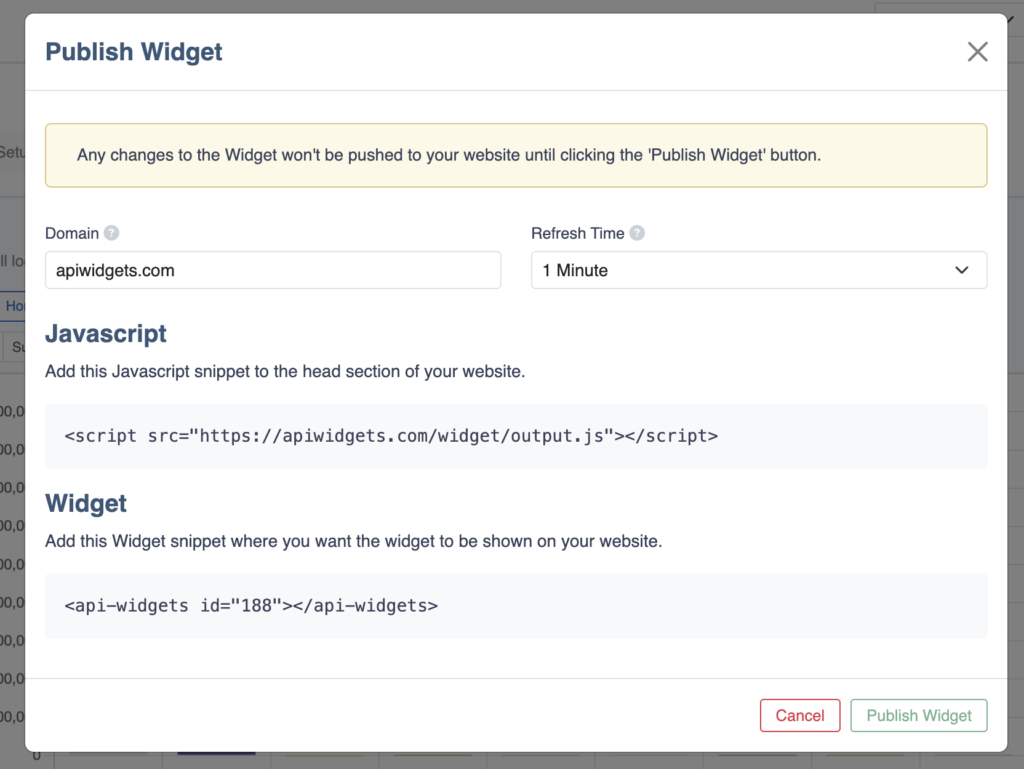
You simply need to click the Publish button and you will see a popup that looks something like the below.

Domain
In the Domain field, add the domain of your website. Each Widget is tied to a single domain and this field is required for the Widget to work on your site. You don’t need to add http:// or https:// in this field.
Refresh Time
This sets the time interval that your Widget should update in.
For example, if you set the Refresh Time to 1 hour, this means that a cached version of the API data will be displayed for 1 hour. The next website visitor after the 1 hour has elapsed will trigger the refresh of the API data, meaning that the API will be called and new data will be supplied to the Widget.
Embed Code
After the Domain and Refresh Time fields have been set, you can click the Publish Widget button. This will make the Widget ready to be embedded.
Javascript Code
Copy the Javascript snippet and add this to the web page where you will be embedding the Widget.
Widget Code
Copy the Widget embed code and add this to your web page where you want the Widget to be displayed.
Making changes to a Widget
After adding the embed codes to your website, if you make further changes to the Widget, these changes will not be pushed across to your site unless you click the Publish button followed by the Publish Widget in the popup.
This prevents any interim edits from being published and ensures that the changes are only pushed across once you actually re-publish the Widget.