API Widgets allows you to use your own JSON file to create a Chart, a Table, or convert the JSON file to HTML.
You don’t need to specifically connect API Widgets to an API, you can use a plain old JSON file that is hosted somewhere on your website (or anywhere really) and then connect to this file.
It is then a matter of deciding whether to convert the JSON to Table, convert JSON to Chart or convert JSON to HTML.
Creating the JSON file
You simply need to create a file that has the extension of .json and you can then add your JSON data to this file.
We have created a sample JSON file to give you an example of what a JSON file should look like: https://apiwidgets.com/sample.json
Uploading the JSON file
As you can see, we have uploaded our JSON file to this location: https://apiwidgets.com/sample.json
You can use an FTP program, or use your websites CMS to upload the file. It really doesn’t matter how you upload it or where you upload it, provided that when you visit the URL to the uploaded file, the file is visible.
Connecting API Widgets to the JSON file
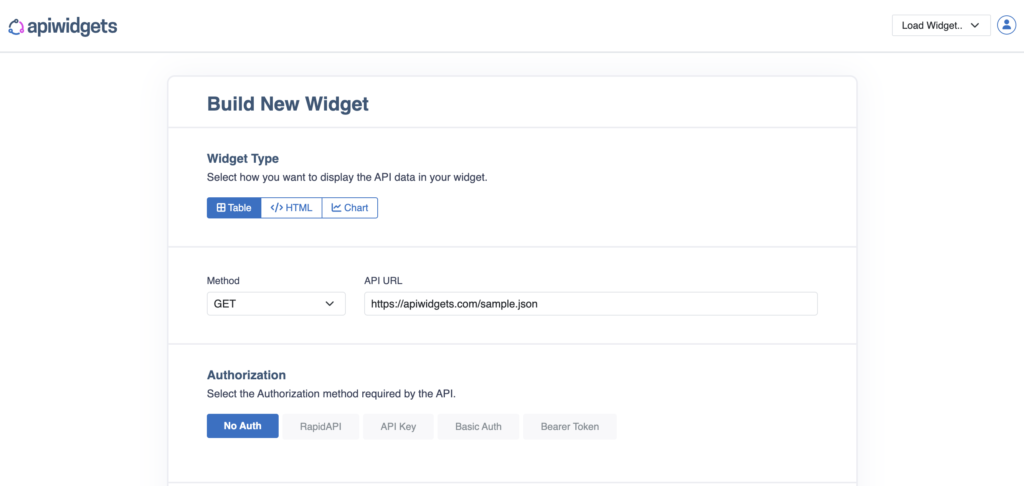
The next step is to log into API Widgets and click on the Builder link in the top header which will take you to the Build New Widget page.
From there where just need to choose whether we want to convert JSON to Table, convert JSON to Chart or convert JSON to HTML. Select whichever option you like.

Now we simply need to set the Method to GET and add the URL to the JSON file that you have uploaded. You can see that we have added the URL to our own sample.json file.
After that, you simply need to click the Test API button, which will simply visit the URL and make sure that we can read the JSON data within the file, and then you can click the Create New Widget button.
JSON converted to Table
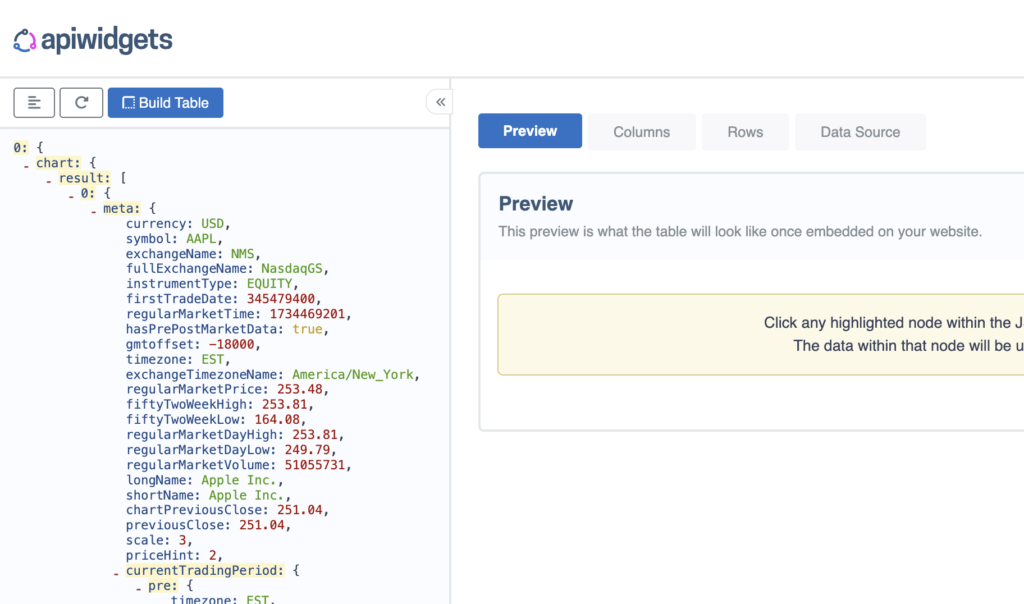
After clicking the Create New Widget button, we now have a Table Widget as that was the Widget Type we chose in our setup.
We can now go ahead and build the Table from our JSON file as is shown here: https://apiwidgets.com/docs/convert-api-to-table/
It is just a matter of clicking on the desired node within the JSON and then clicking the Build Table button. After that you will have a Table converted from a JSON file, which can then be easily embedded into your website.
Here is an article on how to embed your JSON Table Widget onto your own website.

Updating JSON data within Table
Once you have the Table Widget embedded onto your website, you may need to update the JSON file from time to time with current data.
This is simply a matter of updating the data within the JSON and then uploading it to the same URL. Your Widget will then check for new data at the URL and update the data in the Widget accordingly.
The formatting of the JSON must remain the same and the URL must be exactly the same for this to work.
This means that the keys (or names of each item) must remain exactly the same, but it is just the values that should be updated.